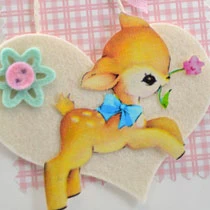
Free Baby Deer Image and DIY Project Inspiration with Chouxchoux Paper Art
in Freebie images, chouxchoux paper art, Free Vintage Baby, Free Vintage Clip Art, Not For Commercial Use on June 6, 2014
I’m sure you see why! First I made a card…

and then a sweet felt book and then the next thing I knew I was sewing up baby booties!
And I don’t even have a baby to give them to! (Oh, wait…maybe I do…my friend, Kirby, just became a grandpa of a little baby girl named Harper – she just might need this sweet ensemble.) Below, I’ve got instructions on how to make the little felt book, links and tips for the baby booties, and a link to the free Baby Deer image.
I chose to make my set for a girl, but it would certainly work for a boy as well.

This felt book is so sweet and really easy to make. I think it is perfect for small pictures and journaling notes. (I printed the deer on canvas – it has a nice fabric feel.) Here’s how to make a little bound felt book.

Cut your felt. The finished size of my book is about 3 3/8 x 3 1/2″. For this size book, cut the cover felt to 3 1/2″ x 6 3/4″ and the inside pages to 3 1/4 x 5 1/2″. I cut two pink strips for a total of 8 pages. I think it could easily hold one more strip for a total of 12 pages.

When you fold all the pieces in half, you might need to do a tiny bit of trimming to get it all evened out. Then I clamped mine together so everything stayed in place. Use a ruler to make tiny dots (I used an erasable fabric pencil) every 1/2″. Sew a running stitch forward. I used all six strands of embroidery floss. If you want a ‘tail’ like mine, leave about 4 inches to work with. You can see it at the top of the second photo.

When you get to the top, you will go around the top of the book and come back up through the back. As you come back down with the running stitch also stitch the sides going around the spine of the book. Keep the embroidery floss pulled taught. At the bottom, you will tie the two pieces of embroidery floss together.
That’s a picture of Lauren on the day she was born! I sewed on the button embellishment – not going all the way through the felt – didn’t want the knot to show on the back. I used just a tiny bit of glue behind the photo and slipped it under the felt button. The same thing would work for journaling spots. The button dies are from Papertrey Ink.

For the baby booties, I used Papertrey Ink’s new Baby Booties dies. They worked really well and were really pretty easy to put together. A couple of tips: You want to be sure that you can see all the sewing holes, so be sure to take time to get all the little holes open. Also, I found it much easier to leave the holes on the very bottom of the back pieces open and sew them when I sewed on the bottom of the bootie. Papertrey Ink has great videos showing how to make the booties.

I made a box with a clear lid for the book and booties.
To download the free baby deer image with the Pink bow, click HERE.
[showmyads]
To download the free baby deer image with the Blue bow hop on over to MY PLACE to snatch it up!
Happy Friday and Happy Weekend, too!

New to FPTFY?!
Welcome! So lovely to have you! Grab yourself a cup of something yummy, sit back and have a look around. There are tons of vintage graphics, artwork, papers, tags, art, school printables, holiday graphics and party collections. We even have Etsy Collections and much much more! There are so many things that you can create with our vintage palette of graphics. I love to pick out a favorite image and transfer it to a pillow or a tote bag for the market or to carry the kids library books in. My go to gift is designing a cool new t-shirt; who doesn’t love a personalized custom t-shirt?! Looking for projects that are under 30 minutes? How about coordinating a blend of graphics to make special tags for gifts, organizing baskets, pantry labels, craft room stickers ..the sky is the limit! Need a banner for your blog or how about a Facebook cover? We have those too! Does the kitchen need a little touch of art or does the Nursery need a bit of whimsical vintage graphic wonder? Here at FPTFY we have you covered. You will find the perfect look for you, your family, friends and the perfect graphics to create accents for your home decor. Are you a scrapper? If your answer is yes, you are going to love our digital scrapbooking elements, digital scrapbooking paper and I am sure you will adore the Project Life Collection along with the extensive collection of clip art. FPTFY is full of fun and fanciful graphics that put the P in Pretty, the C in Cute and the F in FUN! So, if you are looking for a special piece of clip art, a stationery set, encouraging quotes or just a pretty image to create a handmade card you are in the right place. Don’t forget that new creations are being added on a regular basis here, so check back often! Thanks for dropping by and hope to see you again…always overjoyed to see you.
P.S.
Have more questions? Visit my F.A.Q Page.. Can’t find a specific image or project? To make things a breeze, I have carefully categorize all DIYs and images into thumbnail galleries for you to find everything at a glance.
 For more of my work Visit my Digital Shop
Terms of Use: Please refer to this page.


Oh my, cuteness overload!!! The little book and the booties are just the sweetest things. Can’t wait to try the book. Thank you Lori, I’ll be checking your site out. And thank you, Keren, for bringing Lori over to FPTFY. (( ))
I’ve been wanting to make one of those little felt books, how cute. Thanks for the tutorial. Never thought of using binder clips, great idea. Thanks for the sweet image.
Lori is one of the most creative gals around! Such a darling project she has created and that sweet deer is just the cutest thing ever! Thank you for the free image and for the wonderful tutorial.
These are so adorable! Thank you so much for sharing them and for sharing your book and bootie tips!
Thank you for the adorable deer images! Your creations are BEAUTIFUL!!!
Aw THANK YOU Chris! :) You’re so Welcome! enjoy!